Showing posts with label Happy Monday Makings. Show all posts

Monday, July 14, 2014

Happy Monday Makings #18

Hey, Happy Monday! We are having more Spring weather than Winter and although it lovely, I'm sad. I was so looking forward to the cold rainy weather, cosy thick scarves, pancakes(most of you probably know it as crepes) and lots of yummy hot drinks. Okay, so we've had some opportunity for all that, but if you have to get rid of layers on a winter's day in the Western Cape, that's just wrong!

I wanted to share my third ever knitting project (completed from a pattern) with you guys. I found this pattern on Ravelry and was instantly smitten! It's a free pattern called the Vite Cowl designed by Kristi Johnson. I downloaded it immediately and rummaged through my stash in search of the right yarn. 


Way at the bottom of a bag of roving my gran had given me, I came across two balls of JanPaulBarnard Handsun Merino. What makes this yarn utterly amazing is that my maiden name is Barnard and this vintage yarn was locally manufactured! Most spinners, weavers and other textile companies in our country have closed down due to the massive inexpensive imports of Chinese products, so you can just imagine how surprised I was when I googled JanPaulBarnard and they still existed. Only now, they specialise in Mohair production and weaving finished products. I then tried out my 7.5mm  Bamboo knitting needles for the first time, I did a test run to see if the needles would provide the correct gauge with this particular wool and it was perfect! I think it took about three youtube tutorial vids and a whole week to finish my Vite Cowl…


-I never thought it would be possible for me to knit this amazing yet surprisingly simple pattern-


-doesn't this handspun yarn just give the pattern so much more character? I'm so crazy about this project that when I finished it, I wanted to do another one and that never happens to me- 

What have you been up to this weekend, knit anything pretty? Please share your projects in the comments below, I'd love to know what your making!

Have an awesome Monday!

xxx


Tuesday, June 10, 2014

Happy Monday Makings #17

Alrighty! It's Monday and I'm dead tired! That's not such a good thing seeing as it's only the beginning of the week. We're enjoying our Winter rain although it's bluddy freezing, I love the rain! The smell, the sound, the feeling of nostalgia… The need to get cosy and stuff myself with chocolates, delicious smelling, tasting hot beverages. When Dave comes home after work and says: "I'm making pancakes!" (not to confuse you but in South Africa we refer to crepes as pancakes). Anyway, it's the best!

Today I wanted to share with you my very first T-shirt Owl Buddy prototype. I designed this lil' guy for friends of ours' baby boy. I wanted to make him something special for his room. As the theme of his room is that of the most adorable forest friends and the main friend being an aspiring wise owl… I decided to make him an owl plush toy. When Mr. Owl was done, I thought: "wow! that went seemingly painless…" so I made another one. I now have two more waiting to be finished off and I received such awesome feedback from the proud mom, that I have decided to put pen to paper and will soon have diy kits available for sale on my online shop "in the making". So please tell me what you think, would you buy a kit like this? Would you enjoy making your own Mr. Owl? I might design Lady Owl as well, I think the girls would like that.


-Mr. Owl is made with 100% reclaimed materials! Recycled T-shirts and thrifted buttons. His inner is made up of fabric and yarn scraps that I have collected over the past year ~whenever I finish a project, I would gather all the off cuts of fabric, thread, yarn and even the fluff that comes from shaving down thrifted sweaters. I chuck it all into my "scraps baggy" and when there is enough, I use it to stuff plush toys with-  


-I hope little Christiaan enjoys his new friend, I made him with a lot of love-

I'm so looking forward to your comments, thoughts and advise on this little "big" project of mine.

Hope you had an awesome Monday!

xxx


Tuesday, May 13, 2014

Happy Monday Makings #16

Hey-hey! It's Monday! After a lovely weekend and Mother's Day spent with my parents… My Monday turned out not to be so happy. I really don't want to get into it now because when Dave came home he brought chocolate and we had a very nice evening. I made Nachos, we watched Grimm(quite an interesting series) and now I'm here, writing to you guys. I do feel better although, after having struggled with a very evil old lady neighbour and watching a lot of Grimm episodes… I have come to the conclusion that we might be dealing with a Hexen Beast, a witch. There is just no end to her meanness and she is harassing a lot of the other tenants in our complex as well. What a sad case, that someone would spend all of their time and energy to make other people's lives miserable. Like I said, I don't want to get into it and upset myself all over again. Let me rather show you what I did…  

Friends of ours' daughter through out some of her old clothes but before it goes to charity, she thought my mom and I might find some items useful. After all, I love reusing, remaking, and creating new things from old cast aways, so to speak. I try not to buy new, if there is anything I need I always try the secondhand and charity shops. This way you also end up giving back to your society. If we have anything we can't use anymore, it goes to the charity shops, completing a never-ending circle.  

I found a few items that will be very useful and this little yellow number is one of them.


-a very cute little tank, but with an out-dated hem line- 


-showing the lacy detail and the elasticated hem above- 


A Quick DIY
- I started by removing the hem.
-Then, measuring from the cut edge to where you want the top to sit(above or below the bellybutton), cut straight, even strands.
-Take the strands in two's and knotting them together.
-Again, tie the strands together two by two and that's that!


-Now I have a very lovely boho fringe tank. I know our Winter is upon us but I think I'll wear this tomorrow.

I hope you guys had a better day than I did.

xxx


Tuesday, May 6, 2014

Happy Monday Makings #15

Hiya friends, it's Monday again! Time for making pretty things…Today's HMM was inspired by the #randomgiftsoflove I gave my Mom. Her's came about when I was visiting to do some HMM sewing, I was looking for thread in her sewing tin and came across a handful of crocheted flowers. I snuck them home, made a lariat and gave it to her the next week. She wore it to a coffee date with a friend and she loved it so much that she asked what I would charge for one. Well now I have the challenge of designing a pattern, working out my costs and making samples. This is my first sample.


-It went quicker than it should've because I got lazy with writing down what I was doing. I get too excited about my projects and then all I care about is getting it done, fast! So this exercise failed, terribly! Hopefully I'll have more patients with the next one. At least it's good practice, working out the kinks, adding things, taking some away-    


-Piece by Piece: each flower motive done separately and the ends woven in.
-Colour Inspiration: I had just taken this top off the drying rack when I noticed that I have wool in the same colours, I then matched them up in the combination used on the top.

~this baby's mine~

Hope you had an amazing Monday!

xxx


Monday, April 14, 2014

Happy Monday Makings #14

Oh, hey! I'm so excited about today's HMM! As you might have noticed, I've been making friends with my mom's sewing machine. Though I still struggle to sew straight most of the times and that sewing machine is damn moody, I think I might be getting the hang of this. Now, this project was inspired by the beautiful piece of rose-print fabric I found in Pretoria when we were the last September. When I saw it there in the shop I just knew it was going to be a pencil skirt. It took time and a lot of courage (for me) to start this project but last Monday, I did! I worked on it during every off minute of last week and the weekend…and now it's done!


-YaY! WhooooHoooo!!!!! I cannot believe I did it! I made this and it's awesome! I've been wanting to wear rose-printed everything for more than a year now but our local clothing store never have what I want… I'm sooooo happy!-


-Okay…so it's no quite perfect, it was my first! The waist-band part isn't tapered to the curve of my middle 'cause I kinda didn't think of that. Well, okay, to tell you the truth…I didn't use a pattern. I kinda just, winged it! And it worked! Ha! (to all the sewing experts out there, go easy on me) I really enjoyed this-


-Oh, I had sewn the hem at my mom's place and when I got home I ironed the whole thing, fit it on and thought it should be shorter. So I marked where I wanted the hem to be, took it off, turned it inside-out and pinned it all around. I then ironed the hem in place, took out the pins as I went and the sewed it with what looks like a whipstitch on the inside all the while making sure that the stitches on the right side were tiny as hell. Ah! Then there's my very first "clothing" zipper… I know I did it soooo wrong, but I couldn't find my mom's zipper foot and even if I did, I wouldn't know how to use it. So I winged that too.

What do you guys think? Have you made something recently using a new skill?

I'd love to see

xxx


Tuesday, April 8, 2014

Happy Monday Makings #13

Today has come and gone like a wink… Poor Dave had been so sick throughout Sunday night and I had to practically beg him not to go to work:( He refuses to go to the doctor too. I'd been feeding him black organic Rooibos tea and pain killers, it seems to have helped. Rooibos tea is chock full of antioxidants and I remember that when ever I had a stomach bug it helps keep you hydrated and settles the stomach. Dave must have felt really awful as he hates Rooibos tea and he drank more than two teapot full.

Needless to say, today didn't quite go like either of us had planned. I just wanted to share a quick HMM with you guys. I found this awesome image on Pinterest last week. It led me to Lebenslustiger, a really lovely blog. There I found the tutorial for the Chunky Heart Pillow. I thought "how awesome!" and immediately set out to find a crochet hook sized 25mm. No such luck! I then dug in our garage, found a dowel stick which measured 20mm and asked Dave to make me a hook using this tuto. I then dug out my rowing wool which had been stashed away for over 6 year in the hope that I would find someone to spin it for me. I couldn't wait to start my Chunky Heart! Finally, on Friday, I made the first one!


  -it's sooooo FLUFFY-

-Don't you think Dave did great job making me a 20mm Crochet Hook? For some reason, though, my heart didn't come out quite as nice as Lebenslustiger's heart. It still is pretty awesome!-


-so I made two! It goes so quick and it feels so soft and squishy… you just wanna squeeze it the whole time! I made these for our "winter bed", now all we need is a big faux-furry throw(which I've been calling a Wolfy throw, because the ones I've seen look like wolf fur)-

I simply can't wait for Winter! all the knitters and crocheters out there will know exactly what I'm talking about :)


Hope you had the besets Monday!

xxx 


Tuesday, March 25, 2014

Happy Monday Makings #12

Monday-Monday… We had the loveliest rainy day today, I just adore this weather. It leaves me feeling quite nostalgic. Todays Happy Monday Makings (HMM), was inspired by a pin from my board, for me to sew and some vintage-looking thrifted fabric. The pin took me to Pretty Prudent where I found this really easy tutorial, The Most Flattering Shirt Dress DIY.


-This was my first try, working with bias binding but the tutorial was so great I did it…no probs! I couldn't do the shirring in the middle as I have yet to find the elastic thread needed for the job, but it works well with a belt for now. I love that the print on this fabric is that of a vintage themed Autumn-


-the fabric I used is more of a quilting cotton which makes it a bit rigid, so when I fit the dress on I had Buzz Lightyear shoulders. This was not good! I had to do something about those flying shoulders, so I put little pleats in-

I must say I'm quite chuffed with this dress, I loved this tutorial so much I might just make another dress from it.

Are you favouring any tutorials lately? Please share, we love getting the diy scoop!

xxx


Tuesday, March 18, 2014

Happy Monday Makings #11

As promised, the Happy Monday Makings post to go with last week's Outfit Love post. I made this dress from thrifted fabric, found at a local charity shop. It's a lovely knit fabric and is thick enough that I didn't need to wear a slip underneath. The pattern I used was inspired by many a pinterest pattern diy. I simply took a dress I love, lay it flat on my fabric, traced the outlines and cut out the pieces. I then sewed and seamed and voila! I did make some minor improvements… 


-This turned out so great, I've worn it so many times already! It's comfortable, practical and perfect for the heat we've experienced the past three months-


-the dress I used to as pattern, had a gather on the shoulders. I decided to knot them instead. As the original is a wrap dress, it had long strips to wrap the dress with. I thought I'd rather put buttons and loops, this way I could accessorise the dress with a belt or two to create different looks-

I must say I'm really happy with this one, it truly was a Happy Monday Making!

What have you gals been up to? Make anything interesting lately? Feel free to share your crafting excursions with us, leave a link in the comments. I'd love to see what my fellow crafters are up to.

xxx


Tuesday, February 25, 2014

Happy Monday Makings #10

Hey! It's Monday! So here is my latest Happy Makings! I found my inspiration for this project from Cotton & Curls. This blog has been tempting me to further my sewing skills for a while now. Cotton & Curls is full of lovely diy's for making and revamping clothing, among other things. This is such a fresh blog, I just love visiting and just taking everything in. I know, I'm terrible at leaving comments…and staying in touch… I will try my best to comment more on the blogs that I visit regularly.

If you follow this (Tops) link, you'll get the idea. Scrolling through all those diy's just makes me want to make something! And so, I did… it took me long enough! 


-pardon the un-ironed box-top… I was a bit over eager to take the photo's for the post-


-seams! again! you can probably see from the photo above that I really suck at it! I am hopeful that with  practice, I might improve. The photo below shows the burn-out pattern of the fabric, isn't it beautiful? I found it in Pretoria, along with the rose print fabric. I loved this one so much that I bought it in three different colours. So keep a weather eye out for the next Happy Monday Makings-

Hope you had a good one!

xxx


Tuesday, February 18, 2014

Happy Monday Makings #9

Hiya! It's Monday, again! How was your weekend? Mine was very interesting and fun! But first, here is my Monday Makings. I've been sewing on and off since I can remember. Sewing just never appealed to me, not like painting, designing, beading, mosaic, crochet… So, whenever I had a sewing project I would ask my mom, aunt or gran to help me and never developed the skill myself.

I decided that I've got to just do it this year! I started with a few plain and simple things, like this dress. I bought half a meter of beautiful rose-printed knit fabric. I folded it in half(length wise, print facing in) pinned the sides and cut the fabric at the fold. This leaves you with two equal rectangles. I sewed the sides, leaving space for armholes, I then pinned and sewed the shoulders. Seamed the armholes, shaped the neck and seamed that as well. I then turned it right side out and took in the shoulders with two pleats each, by hand. I'm still deciding whether or not to just seam the hem or to get matching trimmings like a pretty lace or something to round it off.


-I cannot wait to wear it! It will be perfect for our recent scorching weather. I also have accessories that would make the cutest outfit of this dress-

Hope you had an awesome Monday!

xxx


Monday, May 6, 2013

Happy Monday Makings #8

As the cooler weather is slowly creeping in, I thought it a great opportunity to use this cute hand warmer diy I pinned last winter. This diy calls for microwavable fabric so make sure that you use natural fibers such as pure wool, 100% cotton, 100% linen (not silk, as you can think it would just disintegrate). Luckily I found a sizable piece of pure woolen felt in one of the bags of scraps the Gillian gave me. It seems to have been packaging or lining for a Louis Vuitton product, the logo was printed onto it in gold. It was perfect for my little project!

   -remember, the thread you use needs to be natural as well, I used cotton thread to sew my pieces together and pure woolen yarn for the embroidered detail- 

xxx

Monday, April 29, 2013

Happy Monday Makings #7

How time flies! Monday already!? So here's what I made today... using scraps of various types of fabric collected over a period of time. I have started to sort all my thrifted and "hand-me-down" fabric into colour stories. This colour story is rich and luxurious, it carries a bit of a Medieval era mystery. Don't you think? I love how it turned out... I found a new fabric flower pattern here.

-love, rouge, velvet-

Monday, April 22, 2013

Happy Monday Makings #6

Happy Monday, Friends! It is such a lovely day here in Hermanus, it seems that winter came early this year. There's an chill in the breeze, the sun is dimmed yet hot and the shadows are so very long. This coming weekend I'm taking part in a local market, hosted in the Sandbaai Hall here in Hermanus. Their theme is Recycle, Reuse, Re- claim and so on... As most of my products are already made of fabrics sourced from local charity shops, I was asked to exhibit at this market. So now I'm working on some new ranges, experimenting with new floral patterns, for winter.

 -this pretty was inspired by the little navy piece above, I found it in a bag filled with scraps and offcuts, it had already been sewn. As I went through the rest of the bag I found this lovely Teal hem offcut and thought it the perfect opportunity to try out this folded rose pattern with leaves-
-and there you have it-

xxx


Monday, March 18, 2013

Happy Monday Makings #5

Just thought I'd try my hand at cross stitch and enter a competition at the same time. Most of you (South African friends) have probably seen the latest Visi magazine I love DIY cover competition. Well I decided to enter at the last minute, I chose a rose pattern. I've recently developed a very strong craving for all things rose-related so it just made sense. I used only left over scrap- and reclaimed yarn for this project. As most of my projects are done with reclaimed material, I thought to keep in line with the reduce/re-use/re-cycle theme.

-so here's to the love of DIY-

xxx

Monday, March 4, 2013

Happy Monday Makings #4

What a lovely weekend! I hope you enjoyed yours as much as I did mine... On Friday I made the loveliest Owly doorstop. Satuday we went to the Design Indaba in Cape Town. I was so mesmerized that I clean forgot to take pictures:-( Sunday was a chilled day, we did all the little things that needed doing, had a visit from my brother Ruan, his wife Tricia, their daugters Erin and Leia and my youngest brother Andre'. A very full but woderful weekend! I almost forgot, I was busy doing a Happy Monday Makings post. Well, here it is...

 what you'll need:

~ an old interesting looking oven glove(I thrifted my from Matchbox)
~ fabric scraps
~ something heavy(I used a stone I picked up on the beach, as big as my palm)
~ fabric that matches you glove/mitten
~ matching thread
~ a big, sharp needle
~ scissors  
  1. Take your oven glove and make sure you can get your hand in all the way to the deepest part. This is important as we are going to stuff this baby and if you cannot get the stuffing in every nook and cranny, this wont work.
  2. See my glove's thumb has a tear, I stitched mine up roughly. Be sure to fix or patch any rips and tears neatly before continuing to step 5.
  3. Now tuck in your glove's thumb, this adds a little secret pocket for love notes, change or even spare keys.
  4. I know, i know... this step usually comes first. But just for interest sake and some sentiment, take a picture of any tags or labels of importance for future reference.    
 
5. Take your fabric scraps bit by bit and start by stuffing it as deep and firmly into the glove as you can until you only have a space left for your heavy object.

6. Wrap your heavy object in a piece of scrap fabric and place in the space mentioned above. Holding everything in place, I put my glove right way up, down on my matching fabric and traced the shape. Using your scissors, cut the shape out leaving a seam allowance of about 1 cm. Cut little slits a bit more than halfway up the seam allowance right around your shape. Now fold the edge on the line you traced, tacking the seam as you go. I used crochet yarn for a visible stitch, adding to the handmade look of my glove. You can use a matching sewing thread if this doesn't suit your glove.

7. Using the same thread, sew your shape to the bottom of your glove. I sewed the two pieces together using a technique my grandmother showed me, I do not know what the stitch is called, though. You basically just insert the needle from the bottom of your shape, pull it out the top and going straight to your glove, inserting the needle from the bottom again. When you've completely sewn up your shape, end it off with a french-knot embroidery stitch. To hide the remainder of the thread, stick the needle in where you made the knot and pull it out at the furthest end you can trim off the end.

~ and there you have it! My very own Owly doorstop~
~lovely, isn't he? Happy Makings!~

xxx

Monday, December 10, 2012

Happy Monday Makings #3

Okay.... I'm trying to get back into the swing of things. Can you believe we're standing at the end of 2012?! With only 15 days 'till Christmas, 19 days 'till we move to our new home and 21 days 'till 2013! Not to mention all the December birthdays in between... So on this Monday, the 10th of December, a cold and windy overcast day, I decided to share with you my new Pink Roses. These are painstakingly made by cutting hundreds of little pieces of fabric, melting each and every little piece and then assembling them into these lovelies. They are then sewn together by hand with beaded details to make them oh so pretty. Most of the fabric I use is sourced from local thrift- and charity stores, some of my fabric is donated by my lovely readers and now and then my fashion designer aunt would send me her off-cuts. I see potential in everything, so this heap of off-cuts just became a lovely garden of pink roses.

-amazing how this bunch of pink can brighten up one's day-

xxx


Monday, October 22, 2012

Happy Monday Makings #2

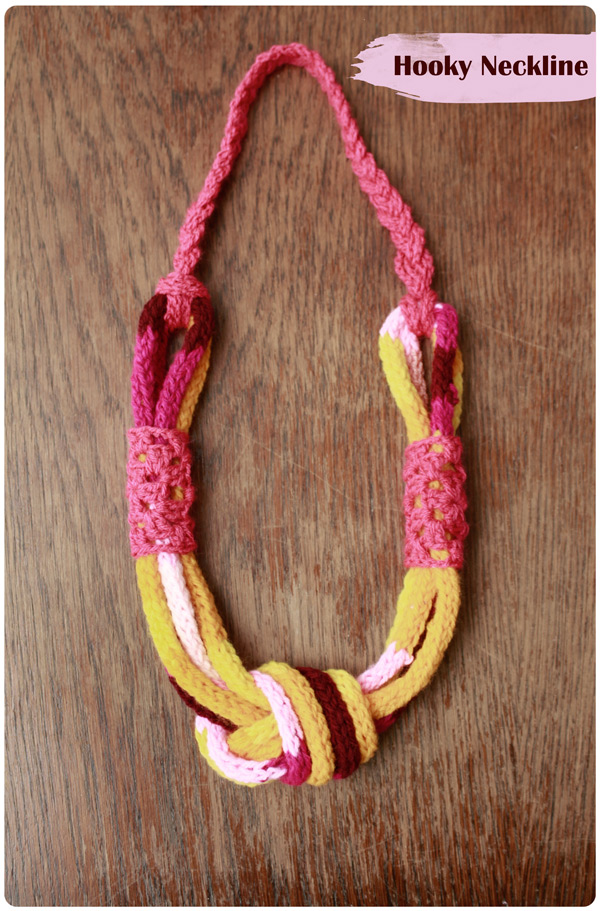
Happy Monday friends! What a crazy-crazy year this has been...and even crazier past week! Through all the madness and having my posts heaping up like, I don't know what... I just had to share this quick post with you guys. I made this with the scraps I had left over from making my first ever crochet jacket (I will post this as soon as I've worked in all the ends:)) I hate wasting anything! I make full use of everything I work with... and I almost never throw anything away. I've been told that I'm a hoarder, but then you can't be an artist and not collect things... Just imagine this pretty necklace would've been in the bin had I not been a collector of "trash".   

-this was so easy to make-
-it took a bit long, though, the french knitting part-

-the pictures are pretty self explanatory, don't you think?-
-love my French knitting doll, an old school friend gave her to me-
-Thank you Katinka, I'm taking good care of her-

  -hope you like it and that you had a nice Monday-

xxx

Monday, September 17, 2012

Happy Monday Makings, YAY!

It wasn't such a Happy Monday, as I had a terrible headache for most of it. What made  my day was the makings of this Monday:) I've been seeing a lot of statement necklaces around and have a little baggy of turquoise acrylic drop beads that I've had since forever and never quite knew what to make with them. They are such a pretty colour and I could not get it over my heart to get rid of them. So inspired by the latest jewellery trends, here is my Happy Monday Makings!


-this lovely piece didn't even take an hour to make, I can't wait to wear it-

xxx


blogger template by lovebird